DIY Autumn Light-Up Tree
October 3, 2024
Seasonal
October 3, 2024
Seasonal
Those of you who know us, know that WE LOVE the “ber” months! That is, September, October 🎃, November 🍽️ 🍂🍁, and of course, December 🎄🎁 ✝️.
The Autumn weather that is so nice here in the Central Valley paves the way for many of our favorite things.
Here's Just a few:
We LOVE decorating our home for the fall season, and you get to enjoy it for quite some time too which is a bonus. We typically start decorating right around the middle of September and they're up until it's time for Christmas decorations. There’s just so much excitement and anticipation for this time of year.
A few weeks back, Linda saw a TikTok for this DIY Autumn Light-Up Tree and when she showed it to me, we both agreed, “We should do this” and started making a list of the materials that we needed to make it happen.
Check out this 1-minute video of Linda and I making this Tree: The step-by-step instructions for what we did are below.
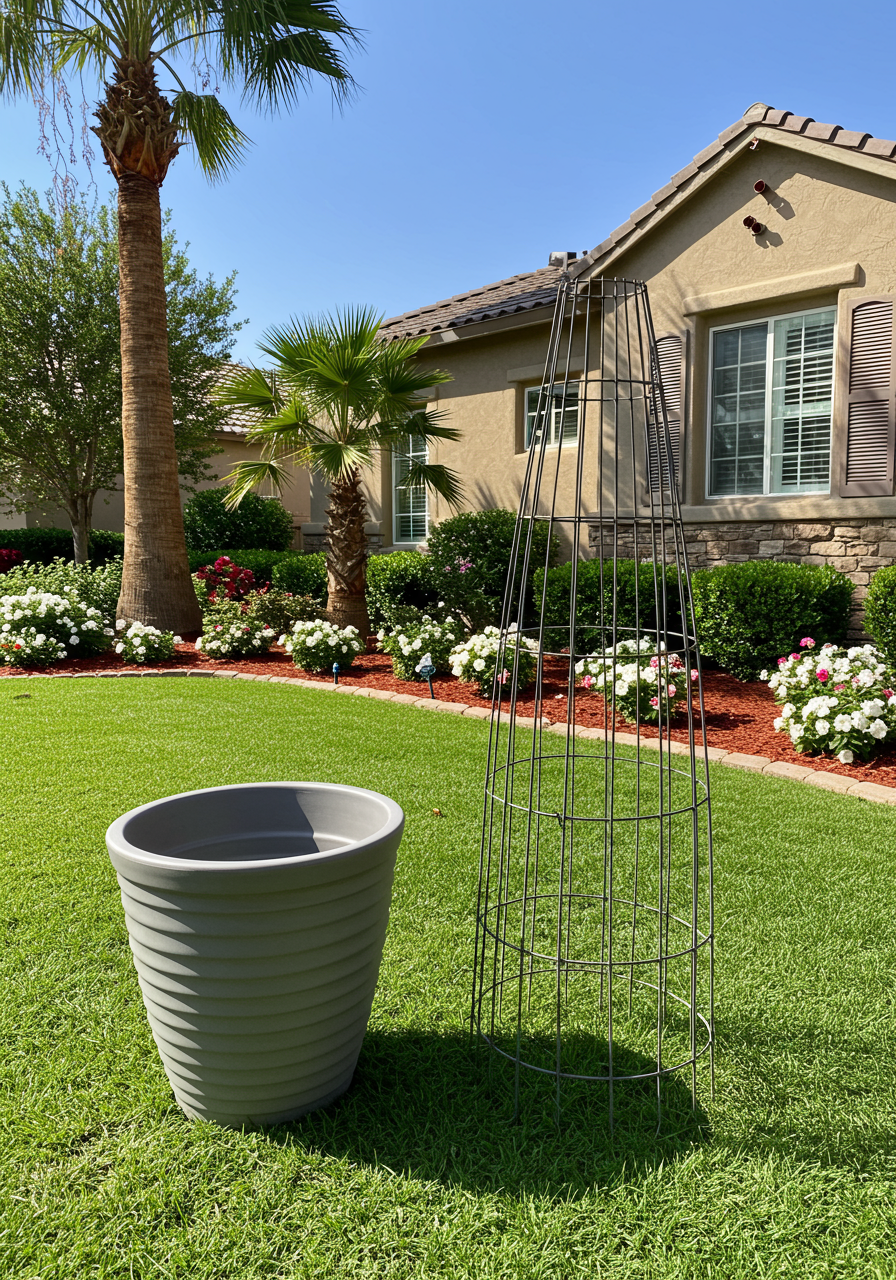
We went on the hunt for a small tomato plant cage. We struck out at Home Depot but found them at Lowe’s in the garden center. They had them stored way up high as it’s not the right season for tomatoes right now, but we hunted someone down to fetch one for us. At that point, we weren’t sure what size we needed so we had the gentlemen bring both a small and large cage down. The small is about 3 feet high and it was perfect. The clerk commented that they should pull them down and leave them because other people had inquired about them for making some Halloween décor items.
Next up that day was to find a flowerpot to install the cage into. We measured the base of the cage and knew we needed a pot that was roughly 15 inches in diameter. We were headed out to the At Home Store in Clovis for other items on our list and it just so happens that they also have quite a large selection of flower pots. We found a nice pot that we liked, and it was 50% off too so we grabbed it. We wanted a matte black pot, and the one we found was grey but no problem, we’d just hit it with a coat of spray paint. 💥 Pro Tip: Bring a tape measure with you to measure the pots to make sure they’re the right size.
The base of a tomato plant cage is open and meant to be in the soil to provide support for the plant. However, the actual bottom of the cage will be the top for this project, so those open wires need to be fastened together. I just made a small loop on the top of one of the wires and then connected the other two inside of the loop and did the best I could to clamp them down. Check out the video above for a visual representation of this.
Next up is to install the cage into the pot you have. We pulled out some black Gorilla Tape that I had lying around and cut three large strips about 8-10” in length. We then worked to get the cage as level as we could inside the pot making sure to view it from multiple angles to ensure it was straight. We then used the Gorilla Tape to secure the wireframe to the inside of the pot. 💥 Pro Tip: Try and weigh the inside of the pot down to give it some stability by using some pea gravel, river rock, or dirt so a wind gust won’t blow it away.
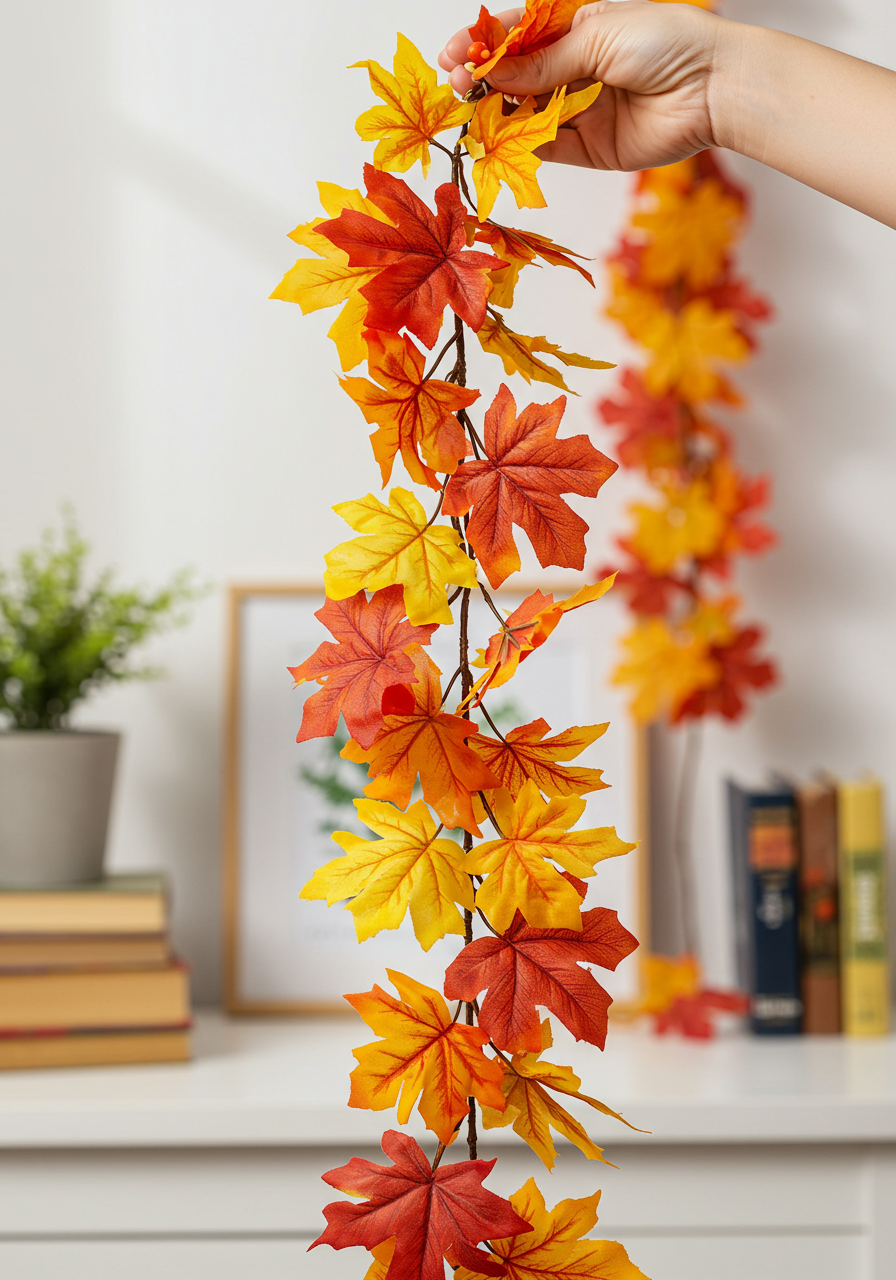
This ended up being the most expensive and somewhat frustrating part of the project. Frustrating in not knowing exactly how much we needed. While at the At Home Store when buying the flowerpot, we perused their fall décor and found a nice garland strand, but it was only 6 feet in length. We purchased 5 strands or 30 feet in total but found out as we were installing that it wasn’t enough. We had to go back and get an additional 3 strands for a total of 48 feet. We used a small clear zip tie and attached the end of the garland to the loop at the top of the cage and then just started working our way down around the cage. We used the same small zip ties to attach the garland strands together and to secure the last end piece at the bottom of the cage. Wrap the garland as dense or loose as you want. If you go looser, then you won’t need as many strands.
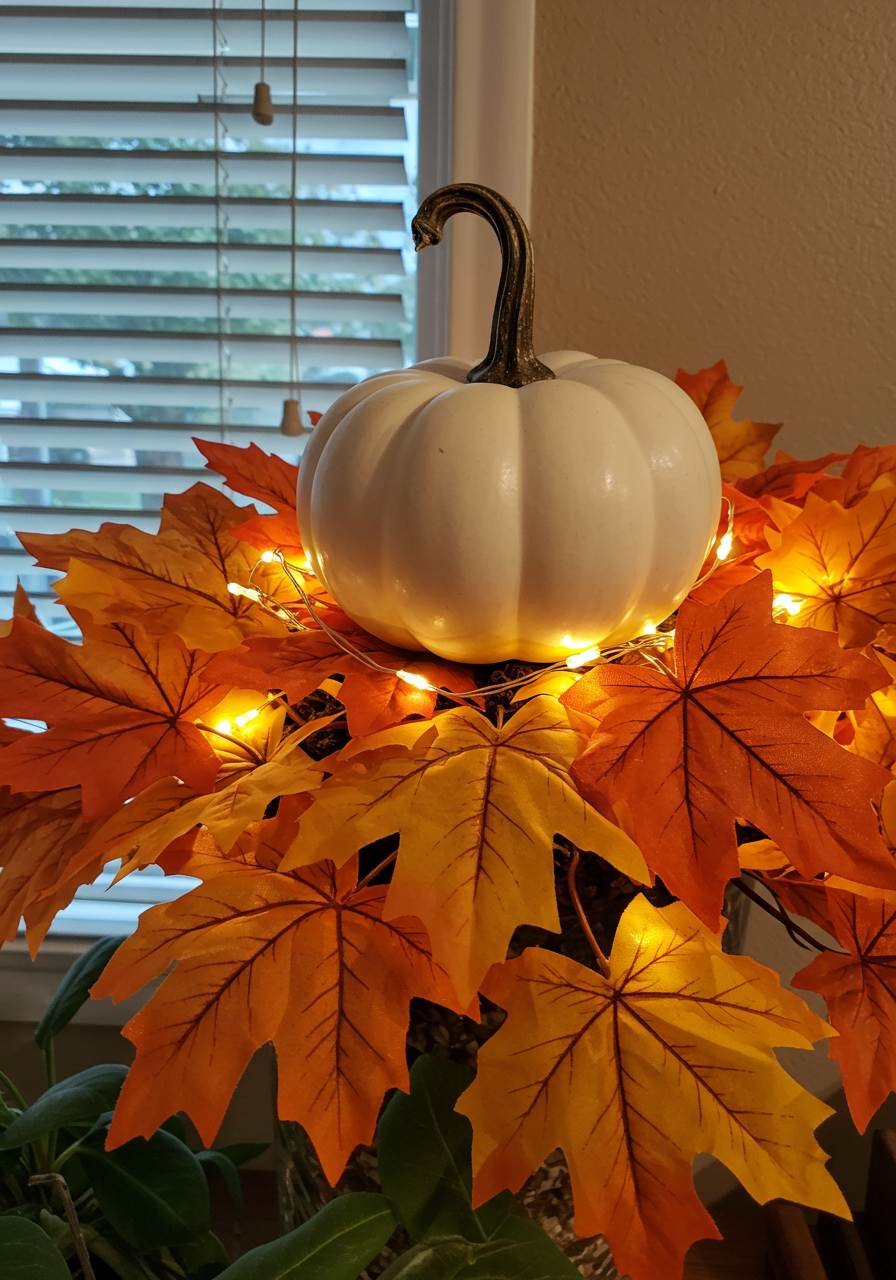
We rummaged through our Christmas boxes until we found some LED light strands that we had used several years back on our Christmas Tree. This strand twinkles too which is a nice touch. I’m not sure exactly how long it is as we’ve had it for years and I didn't measure it, but it was pretty long. Make sure you have several strands with you just in case. Once again, we attached the end of the light strand to the top of the cage and worked our way down around the tree. This part is also subjective as you can wrap it tightly for more light or loosely for less. We went tight as our light strand was nice and long. Once completed, Linda went back and fluffed out all the garland leaves that got smashed inward by the lights. This monotonous work, but it really made a big difference.
While we were still at the At Home Store, we found a small white pumpkin that we thought might be a good topper for our tree so we picked it up. I simply drilled a ¼” hole at the very bottom of the pumpkin and stuck it onto the top of the wire cage. We’re happy with how it looks and it also provides a bit of contrast and elegance to the tree.
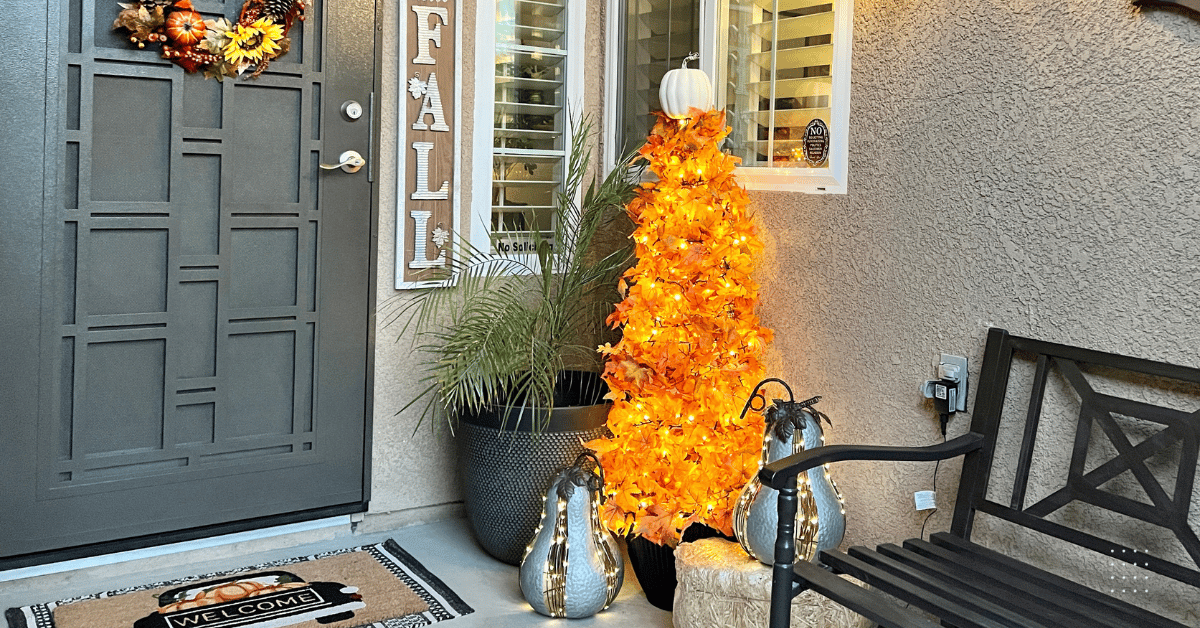
We had already decided we wanted our Autumn Light-up Tree on our front porch. However, it would also look equally as nice in the house in several different spots.
If you decide to take this project on, we hope you have fun with it and maybe even do it as a couple or the whole family. Linda and I made a day out of running around to purchase all the materials, had a great lunch, and then started the project the next day. We still have a few last touches to do on our front porch display, but this is a really nice and elegant piece to add to our fall décor collection.
Don’t hesitate to reach out if you have any questions.
All our best!
Stay up to date on the latest real estate trends.
Fresno Real Estate
January 23, 2026
A Market Finding Its Balance
Fresno Real Estate
January 15, 2026
Will the Market Find Its Footing?
Fresno Real Estate
December 2, 2025
A Guide to the Best Buying and Selling Seasons

Fresno Real Estate
November 24, 2025
and Protect Your Investment
You’ve got questions and we can’t wait to answer them.
Get In Touch With Our Team To Learn More
8050 N Palm Ave., #300 Fresno, CA 93711